
The following is a basic introduction to installing and testing the CWRU-MRI Realtime-MRI-Visualization Github project described in this paper.
This project has two main elements: a Gadgetron-based reconstruction pipeline and a Unity-based visualization tool for the Microsoft Hololens 2. We’ll start by installing the application on the Hololens.
Hololens 2 Installation
First, download the latest release of the Unity application from Github. You can also build the application from source if you so choose. Once you have downloaded and extracted the Unity release package, start by connecting to your Hololens 2 Device Portal through your computers browser. This will be hosted at the IP address of your device, but may require enabling developer mode in your settings. Navigate to the Views->Apps page. It should look something like this:
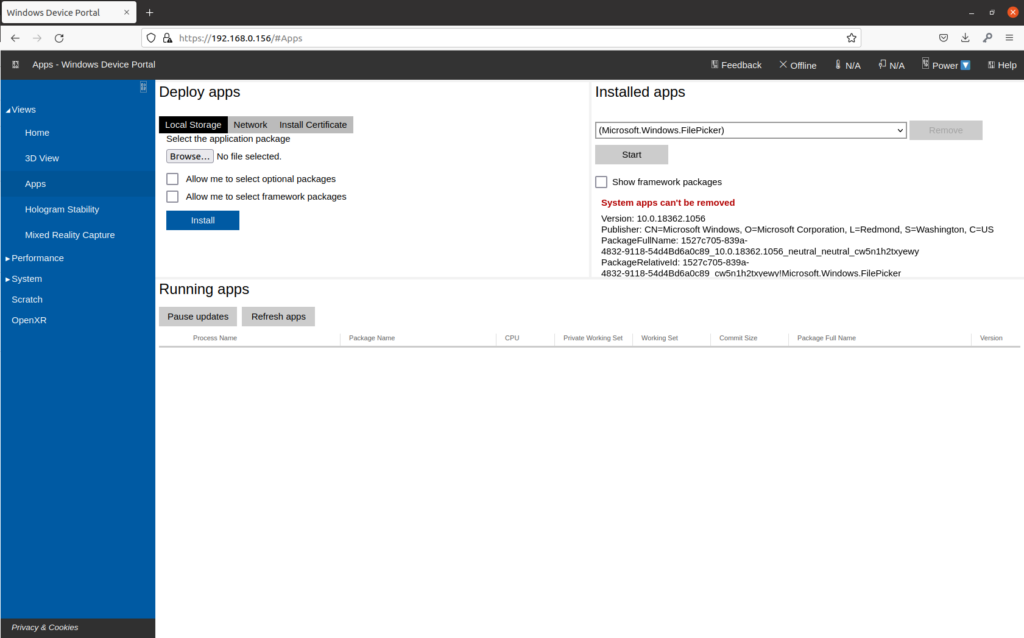
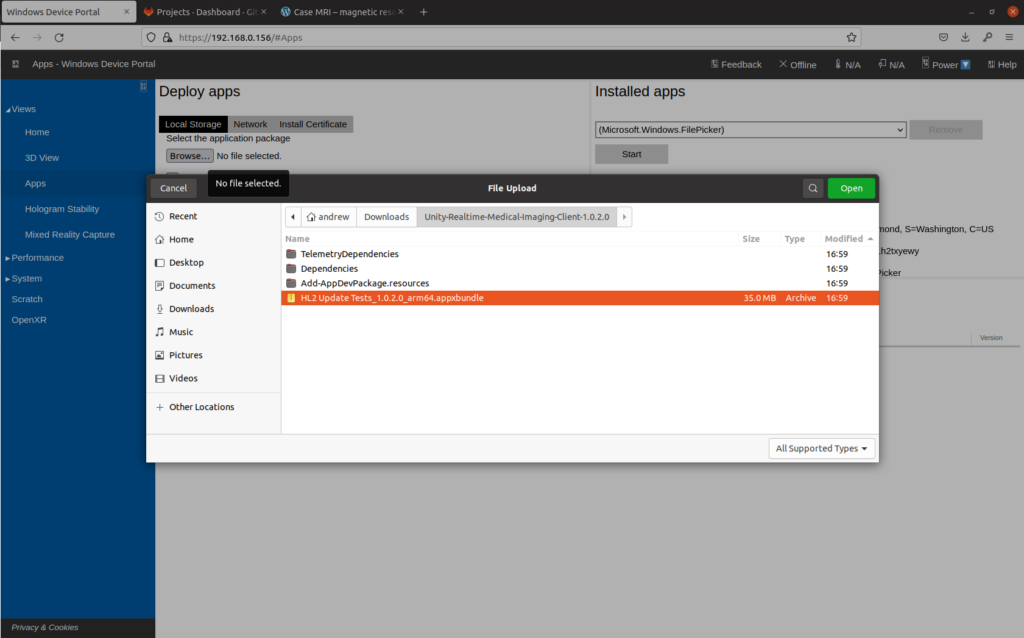
In order to install the application, click on “Local Storage” under Deploy Apps. Use the browse button to select the appxbundle inside the unzipped application folder:
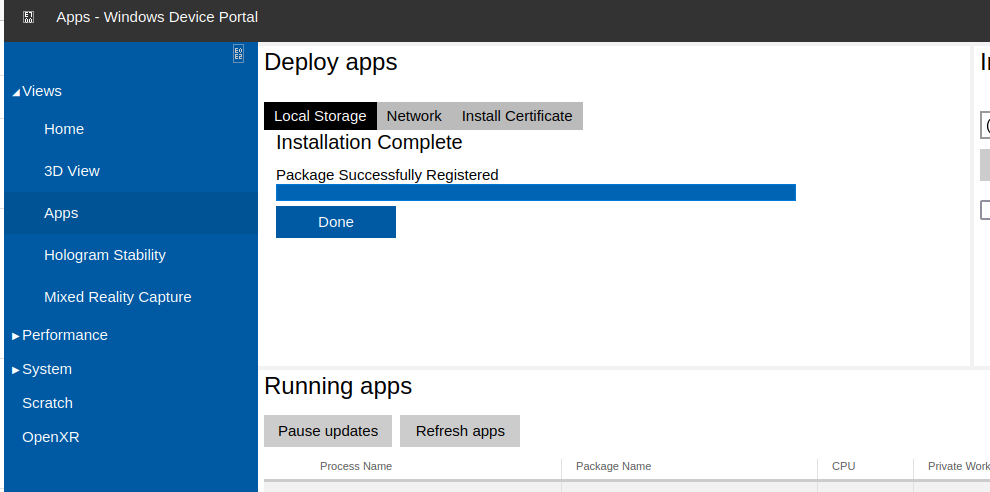
You can now click “Install” under the Deploy Apps section, and the installation will begin. You will eventually see “Package Registration Successful”, meaning the application is now installed:
Put on your Hololens 2 and open the “HL2 Update Tests” application from the Start menu. Once the application starts, you should see the below scene:
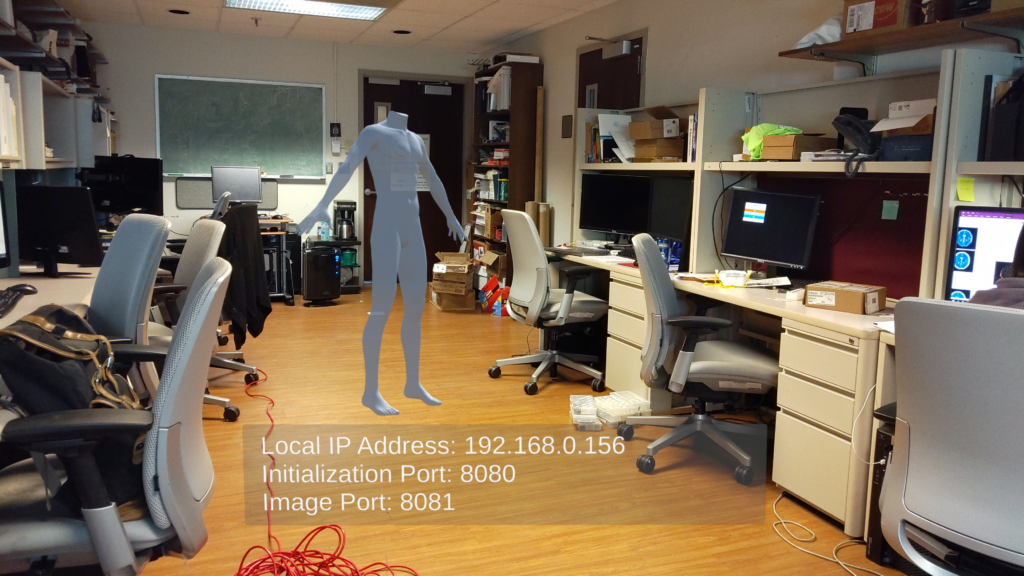
This is the “Initialization” screen of the application, meaning that it is waiting for a connection from the image reconstruction system. You can position the body as appropriate within this scene – wherever you place the body (and in whatever orientation) will determine the position and orientation of the visualized images once the system is running:
You are now ready to set up the Gadgetron reconstruction system to send images to your device.
Gadgetron Docker Configuration
While you can build and run the Gadgetron reconstruction pipeline from source, we encourage you to use the Docker container we’ve prepared as a starting point. If you need to install Docker, see this instructional guide.
Start by pulling the Gadgetron Realtime Cardiac docker image from the public Github Container Registry associated with this project’s repository:
docker pull ghcr.io/cwru-mri/gadgetron-cardiac-radial-grappa:latestOnce the Docker image downloads, you are then able to start the reconstruction system using:
docker run -it -p 9002:9002 --gpus all ghcr.io/cwru-mri/gadgetron-cardiac-radial-grappa:latestBreaking this down:
- docker run || starts a docker container
- -it || start the container interactively so we can see the logs in realtime
- -p 9002:9002 || maps the Gadgetron port (9002) to the host machines port so that the system can be accessed outside of the container
- –gpus all || allows the container to access the GPUs installed on your machine. (this project requires a CUDA-capable NVIDIA GPU)
- ghcr.io/cwru-mri/gadgetron-cardiac-radial-grappa:latest || this is the image:tag pair that you are using as the source for your container
Once you run the above command, you will see the following status updates indicating that the Gadgetron and the supervisor daemons have successfully started:

You can now send data to the Gadgetron instance for reconstruction – however, the version of the Gadgetron ISMRM-RD client must match the version used within the Docker container. You can either install the appropriate version of Gadgetron and the necessary dependencies within a conda environment on your local machine, or simply use another instance of the same Docker image as your reconstruction runner.
Example Reconstruction
To test our system, we’ll be using a second copy of the same Docker image above, since this keeps version control a bit more simple (and is portable to any other machine too).
For the below exercise, I’ll be using the two datasets below as a test. Feel free to download them and follow along:
In order to use a Docker container as a reconstruction data client, we need to map the location of the source data into the container. For example, if my desired datasets were located at “/home/andrew/testdata”, we’d use the following command to start a container:
docker run -it -v /home/andrew/testdata:/tmp/testdata ghcr.io/cwru-mri/gadgetron-cardiac-radial-grappa:latest /bin/bashBreaking down the new parts:
- -v || maps a location on the local filesystem (/home/andrew/testdata) to a location within the new container (/tmp/testdata)
- /bin/bash || by putting the bash command at the end of the docker run command, we can start a bash shell instead of another Gadgetron instance
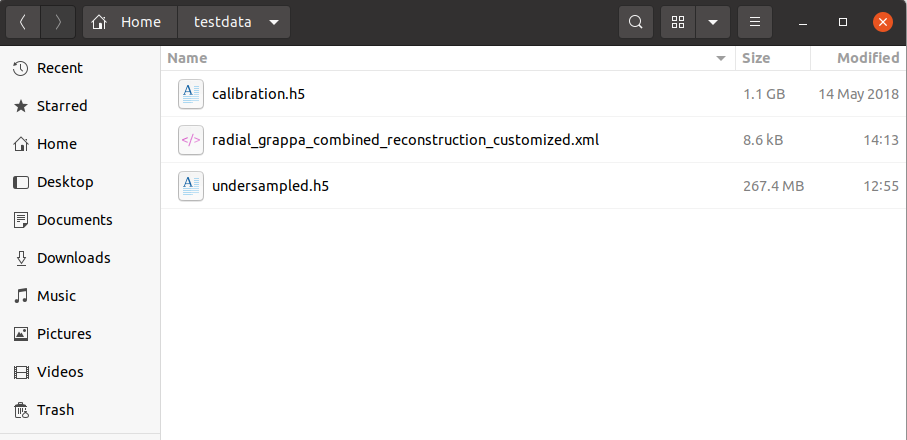
Running the above (in a new terminal, not the one running your Gadgetron instance) and browsing to /tmp/testdata will show that this command successfully mapped our testdata folder into the container:
We can now use this client instance to start the image reconstruction process.
First, we need to run the “calibration” data and reconstruction pipeline in order to generate the necessary GRAPPA calibration files for the undersampled reconstruction pipeline:
gadgetron_ismrmrd_client -a 192.168.0.105 -p 9002 -f /tmp/testdata/calibration.h5 -c radial_grappa_combined_calibration.xmlNote that I’m including the IP address of my computer in the gadgetron_ismrmrd_client command to simulate the scenario where the Docker host isn’t your local machine. You can find your IP address by opening a new terminal and typing “ip address”. Look for the entry labeled “eth0” – your ip address should have the format xx.xx.xx.xx, followed by a subnet mask (“/24”).
With the weights generated, we can now run the undersampled data through its reconstruction pipeline (but don’t run this command yet):
gadgetron_ismrmrd_client -a 192.168.0.105 -p 9002 -f /tmp/testdata/undersampled.h5 -c radial_grappa_combined_reconstruction.xmlThe reconstruction pipeline doesn’t know where to send the resulting data – we haven’t told it the IP address and port information of the Hololens 2 application we set up earlier. The easiest way to do so is by creating a copy of the “radial_grappa_combined_reconstruction.xml” pipeline configuration file and storing it next to your datasets. This way, you are able to directly edit the parameters of the pipeline, as well as the Hololens IP addresses, without needing to generate new Docker images. The file can be downloaded here – save it to the same testdata directory where our datasets are located, rename it to indicate it’s a customized version of the configuration file, then open it in a text editor:
I’ve isolated the section we care about in the block below. The bolded values below control the connection to the Hololens 2 device. As we saw during Hololens setup above, my device is available at a local IP of 192.168.0.156, with ports of 8080 and 8081, so I’ve filled in the appropriate values:
{beginning of file}
.....
.....
<gadget>
    <name>ImageFinishExportHoloLensGadget</name>
    <dll>gadgetron_finish_client_lib</dll>
    <classname>ImageFinishExportHoloLensGadget</classname>
    <property>
        <name>perform_timing</name>
        <value>false</value>
    </property>
    <property>
        <name>verbose</name>
        <value>false</value>
    </property>
    <property>
        <name>hololens_ip</name>
        <value>192.168.0.156</value>
    </property>
    <property>
        <name>hololens_init_port</name>
        <value>8080</value></property>
    <property>
        <name>hololens_image_port</name>
        <value>8081</value>
    </property>
</gadget>
.....
.....
{end of file}
Once we make the necessary changes, we’ll be able to use the following command to run the reconstruction pipeline again, this time using our externally-provided configuration file (note the CAPITAL -C flag instead of lowercase this time):
gadgetron_ismrmrd_client -a 192.168.0.105 -p 9002 -f /tmp/testdata/undersampled.h5 -C /tmp/testdata/radial_grappa_reconstuction_customized.xmlOpen up your Hololens 2 application, the run the above command. You should now see the reconstruction process run, and images should begin appearing:
You can manipulate, scale, window, and level the datasets using your hands as the controllers. Note that window/level controls are only applied as new data comes in – you can always hit run again on your reconstruction to see the data playback again.
If you want a single-line command for running the docker client reconstruction process, you can combine the commands above by replacing /bin/bash with the actual reconstruction client command as folllows:
docker run -it -v /home/andrew/testdata:/tmp/testdata \
ghcr.io/cwru-mri/gadgetron-cardiac-radial-grappa:latest \
gadgetron_ismrmrd_client \
-a 192.168.0.105 -p 9002 \
-f /tmp/testdata/undersampled.h5 \
-C /tmp/testdata/radial_grappa_reconstuction_customized.xml
Feel free to customize the source and target mount points as you see fit. You should now be able to take any of the Cardiac Radial Grappa source datasets and run them through the Gadgetron->Hololens visualization pipeline!